Showing posts with label knitting. Show all posts

Thursday, October 11, 2012

Fall and Leafy Sweaters


I've been knitting up a storm these past few weeks knowing that I might not have the luxury of spending undivided attention on what's on my needles the next few weeks with a new puppy in the house.  I'm rather hoping that he will want to snuggle on my lap but NOT want to attack my yarn but I'll let you know if my hope and the reality happen to coincide.

Anyway, with the leaves turning colors here in Pennsylvania, what better project to finish then a nice comfy garter-stitch sweater?  If you aren't a knitter, I'll give you fair warning.  Most of the rest of this post is going to be about knitting.  You have my permission to wander off, make yourself a nice cup of coffee and cuddle with your furry friend(s) or your honey.  As I was saying, this particular pattern is called Lily and it is from the book Essentially Feminine Knits.  It features easy-peasy garter-stitch knitting until you get up to the yoke of the garment and then a very easy lace pattern.

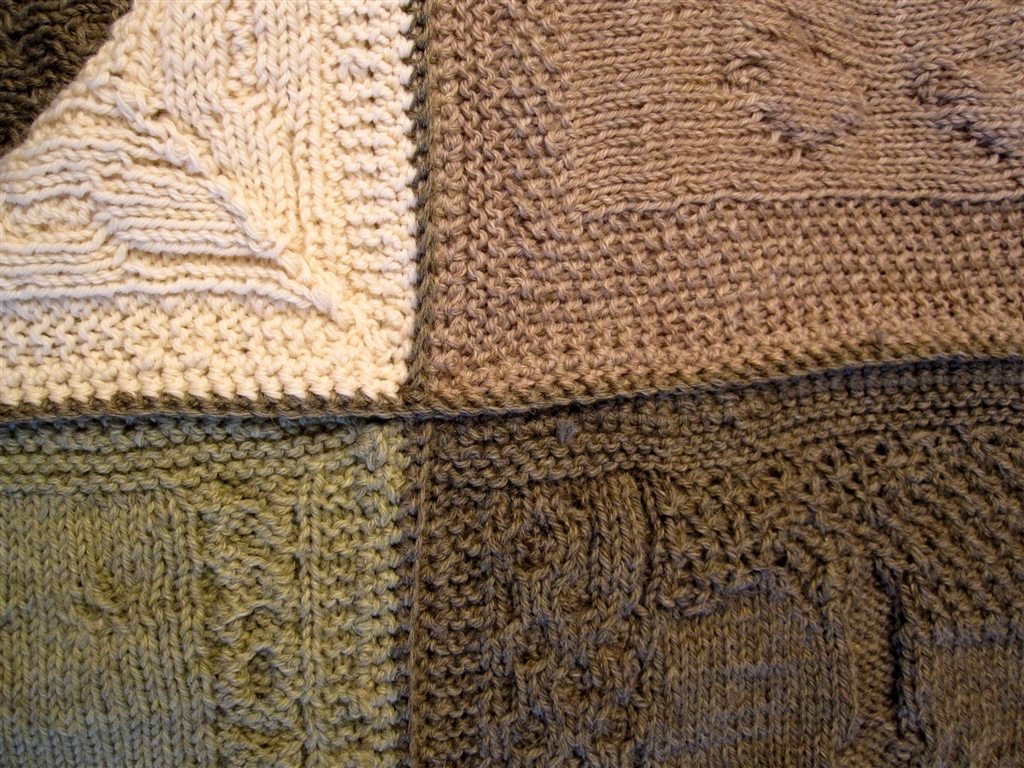
The lace chart is just 38 rows and it results in a lovely border of leaves going around the sweater.  What could be more perfect for Fall?  And my goodness, is this sweater ever comfortable.  I can already tell that it is going to be one of my "go-to" sweaters this fall and winter.


The knitting is quite easy.  I only had one hiccup.  I'm not terribly sure how it happened but, when you get to a certain spot on each of the garment pieces, you have to bind off a certain number of stitches on the right side and then put the remaining stitches on a holder.  I did that for each piece.  However, when you are ready to do the yoke, you put all the pieces together again on to one circular needle and start knitting the yoke.  After a few rows, I realized that I had one spot where my garter-stitch wasn't right.  It looked like I had a row of stockinette on just one section.  Of course, it would be right in the front.  AARGH!  I ripped out a row and tried to undo and redo the offending stitches to make them be purls instead of stockinette but the end result was a raised area in the front and a small 2-row section of stockinette in the back.  Hey, at least the stockinette was no longer visible on the front.  I could live with the raised area.  I call things like that "design elements."

Here is what I think happened.  I think I bound off the number of stitches required in that section and then FINISHED KNITTING THE ROW before putting those stitches on a holder.  For the rest of the sections, I must have bound off the stitches and stopped at that point and put the rest of the stitches (not yet knitted) on a holder.  That is the only way it could have come out differently.  So be warned if you are making this pattern.  STOP after you have bound off the stitches and put the rest of the stitches on a holder.


There was one other thing that had me a bit confused.  When the time came to put all of the pieces onto the one needle, I wasn't quite sure how those bound off parts were supposed to line up.  There are some pictures shown but I guess I needed a "blow-out" section showing all of the pieces lined up for assembly.  I took a gamble and lay it all out with bound stitches to bound stitches when laying it out flat and then took my circular needle and picked up all the stitches that were on the holders as I came to them.  I STILL couldn't quite visualize how it was all going to be seamed but lo and behold, once it was finished, I just seamed up the side seams and then I seamed the sleeve seams and that left me with one obvious small seam under each arm that I seamed and everything was good.  Yay!

This particular sweater was knit out of Cascade 220 yarn, a wonderful workhorse of a yarn in my all-time favorite color, which I call "Spring green."


On the dog front, my fellow "expectant puppy mom" mentioned that she had purchased a pink Bobo for her puppy.  I'd heard of these Bobo toys and most of the comments about them were that dogs found them irresistible.  So when I went over to the pet store today to pick up something, I decided to swing over to the toy aisle and check them out.  There were quite a few in many styles.


I was looking at this one and trying to find the squeaker to check out the sound.  I finally located it and boy, did it have a great squeak.  Just then I heard whining.  I turned around and here was a lady and her dog.  The dog was going nuts.  He was doing everything but crawling on his belly over to me.  He was whining and looking at me with a big grin and finally he sat on his haunches and gave me a look that said, "Please, oh, please....could you toss it this way?"

"Well," I told his owner.  "If THAT isn't a ringing endorsement by a doggy customer, I don't know what is.  This Bobo is definitely going home with me."


Thursday, August 30, 2012

Prehistoric Buttons for the Modern Knitter


If you are a knitter, chances are that you have knit a garment at some point in your knitting career that required buttons.   I don't know about you, but I am ALWAYS on the lookout for unique buttons that I think will set off projects I might have in the works.


Recently my sister-in-law gave me a set of buttons for my birthday that were made out of Petosky Stone.  If you're from Michigan, you are probably familiar with these wonderful stones.  If you aren't, let me tell you a little about them.  They are actually fossilized coral that are found in Michigan, often along the shores of Lake Michigan and some of the other Great Lakes.  They were originally part of some great coral reefs found in the area millions of years ago.  As the coral died off, it eventually fossilized and then, when the glaciers moved through the state, the glaciers dragged fragments of these frozen bits of prehistoric history around the area.  Now the Petosky Stone is the official State Stone of Michigan.    Seen above, it doesn't look like much, does it?  Now obviously, you wouldn't be encountering it in a button shape along the beach but as a pebble or rock.  It would look more like a pock-marked piece of concrete or volcanic stone unless you got it wet.  That's when you see the wonders that are in that unassuming stone.  (As kids, we used to search for Petosky Stones and then bring our treasures home and entertain ourselves by dipping them in a bucket of water and watch the patterns of the coral emerge.)


My sister purchased these buttons from the delightfully-named vendors called Two Old Stoners at a craft fair.  The button on the right is how it looks before you polish it.  The button on the left is how it looks after being polished.  Wonderfully, they include easy-to-follow instructions on how to polish these that use three simple items....an emery board, some sandpaper, and baby oil.  Piece of cake!

Here's a look at another of the buttons after I had polished them. Aren't they unique? They'll be perfect for a sweater that I have in mind and I already have the yarn in hand. If you'd like to see more of the Petosky Stone products that these vendors are making, you can follow them on Facebook (under "Two Old Stoners"). Happy knitting!

Friday, May 18, 2012

2009 - 2012 And Finally Finished!


My Great American Aran Afghan is finally finished.  I had posted earlier about how I laid out all the squares and decided how I wanted to arrange them and then how I had attached each square together.  Well, once that was accomplished, all I had to do was decide what I wanted to do for a border.


The pattern book had suggested a cabled knit border.  It is a lovely border but I decided that I really didn't want to do it.  No particular reason other than the fact that I thought the afghan was "busy" enough with all the different patterns and I wanted to have the focus on them instead of a dramatic ivory cable running all around the edge.


I fell back on my old standard for finishing off blankets and afghans.  I fished out one of my crochet hooks and gathered the remnants of the yarn I had used for the squares.


My next step was to decide what colors I wanted to use.  I decided to use all of the colors that I had used in the afghan itself.  I had a skein of each so I figured that I should have enough.  For the first row, I did a row of single crochet stitches all around the afghan.  The second row, using the same color as the first row, was a row of half double crochet (hdc) stitches in each single crochet stitch although when I came to the corners, I did a hdc then a chain stitch and then a hdc in the corner stitch.


From then on, I did two rows of half double crochet stitches for each color until I got to the final light green color before the last edging stitch.  I just did one row of hdc stitches using that light green.  At that point, I had found an extra ball of Cascade yarn (with a blend of alpaca) laying around that I thought would add a nice touch of drama to the edge so I decided to finish off with that.


I pulled out one of my crochet stitch books and picked a shell /scallop edging.  It was basically do 5 double crochet stitches (dc) in 1 stitch, skip a stitch, do a single crochet stitch in the next stitch, skip a stitch and then repeat the sequence all around the afghan.  When I'd come to the corners, I'd work it so that I'd do a scallop right in the corner stitch and I'd do 6 dc stitches just to give it more ease to get around without curling.  It wasn't an exact science.  I didn't bother counting all of my edge stitches before I started with the final edging.  I figured I could "fudge" a little to get my scallops in the corners and that is exactly what I did.  "Close enough for government work", as we used to say in the Navy.


The afghan is now residing on the back of our living room sofa.  When I was placing it there, the Commander jokingly said, "Hmm, I think I need to take a nap."  I had told him several days ago that he would NOT be allowed to use this afghan when he was napping on the sofa.  I worked too darn hard on it.  I was actually joking.  Well, not joking about working hard on it, but joking about not letting him use it.  Of course, he can use it.  It's not going to just be for show.  I WILL, however, put it away in the hope chest when the grandkidlets are visiting. Fancy afghans, sticky hands, and leaky sippy cups just don't go well together.  Once it's out of the picture, they can't do anything more to that sofa that the dogs and the cats haven't already done.

Thursday, May 10, 2012

Gaining on the Great American Aran Afghan


Well, I'm getting much closer to finishing my Great American Aran Afghan.  If you remember, I started it several years ago with a group of ladies at my local yarn shop.  We met once a month and worked on one square a month.  There were a few months when we didn't meet but mainly we plugged steadily along, coached by our yarn shop owner/instructor.  It has truly been a labor of love, one which has stretched me far beyond what I thought I was capable of knitting.  Now that I've finished the squares, I find that I am not intimidated by cables any longer.  Whee!


I did all of the squares in the book by the same title (published by Knitter's Magazine) except for two.  Once I had them completed and blocked, the next step was to find a large, open space where I could start playing with an arrangement until I had one that I liked.  I ended up with 5 rows of 4 squares each.  That left me with 2 leftover squares which will become pillows.


When I had them laid out the way I wanted them, I carefully worked my way from the bottom and left to right and stacked the squares row-by-row, pinning a piece of paper to each pile identifying which row it was.


My next decision was how to join the squares.  I decided to first join my squares in the rows together using a single crochet seam.  I joined the bottom row squares first and worked my way up to the top row, setting each completed strip on top of the previously completed strip just to keep them in order.  


Then I took the top strip in the pile and joined it to the next strip using the same single crochet seam technique, trying to match the squares as I crocheted across.  Oh, I guess this would be a good time to explain that each of the squares is supposed to be 12 inches by 12 inches.  In reality, they vary.  To try to standardize them, I had first done about 3 or 4 rows of single crochets around each square in the same color yarn as the square.  I kept note of how many stitches I picked up while I did the first square and then picked up the same number of stitches on all 4 sides on every square.  Therefore, even though the squares aren't exactly the same size, when I seamed them together, it was fairly easy to match up the stitches between squares.


Now that I have all the squares/strips joined and the seams steamed, the next and final step will be to do a border around the whole afghan.  The book has you do a knitted cable border.  I don't plan to do that.  It's just too fussy for me.  I think the squares are busy enough.  I think I'll probably do a half-double crochet border around the afghan, doing 4 or so rows using the different colors in the afghan.  Once finished, it will have a place of honor on our living room couch.  I'll almost hesitate to use it, given all the work that went into it, but I imagine I will when the weather turns cold again.  However, I WILL hide it when the grandkids are about.  Sorry, Sweet Pea and Spud!  Don't feel bad for them, though.  They each have their own quilts that Nana made for them so they aren't hurting for something to snuggle under.

Sunday, March 18, 2012

Painless Veggies and Knitting, Too


I just finished another sweater.  This one is called the Artichoke Sweater designed by Marly Bird.  It was a fun sweater to knit up, basically knit in the round from the bottom up so that there are no side seams or shoulder seams to sew up to finish the sweater.  Those are MY kind of sweaters.

The pattern called for Light weight yarn but I decided to go with Cascade 220 yarn, which is worsted weight.  I'm always cold so I figure if I'm going to knit up a sweater, it might as well be one that will keep me toasty.  However, since I made the substitution to worsted, that meant that I had to make a few modifications.  I was getting gauge horizontally but not vertically.  In cases like that, I think you have to decide if you want to keep tinkering with things to get it as "spot-on" as possible or if you are going to go more with finding the "fabric" that you will be pleased with.  I decided to go for the latter.  Plus I think it is easier to make adjustments vertically when measurements are given along the way (and this pattern provides plenty of those as you knit along so that you can double-check yourself) than it is to revise your knitting for width.  All that to say, I switched to a Size 7 needle, cast on, and started merrily off.


Now I had started this sweater as part of a class offered at my local knitting shop.  Our instructor had us do the sleeves first.  Then we went back to following the pattern as the designer had it laid out, casting on for the body of the sweater.  If you look carefully at the picture above, you'll see that the border of the body of my sweater (at the left of the picture) is not the same as the cable border of the sleeve (at the right of the picture).  There is an extra "bar" between each cable on the sweater border.  Quite a few of us in our class made this mistake, including our instructor.  I THINK now that you are supposed to work the sleeve border using the 8-stitch repeat all around the sleeve as it shows in the chart.  Frankly, I don't know WHAT you're supposed to do with the bottom of the sweater.  If you look at the picture in the pattern, it does NOT have the rows of stockinette stitch between each twisted cable.  It looks just like the cabling pattern of the sleeves.  But if I read the chart, it sure looks like those extra rows would be in there.  I guess to make it look like the pattern picture, start the beginning of your row with the K2, P2 pattern on the right side (and conversely the P2, K2 on the wrong side) and then go into your 8-stitch cable pattern which is designated the "8-st repeat" - Sleeve" and repeat that part all the way across until you get to the last 4 stitches and then do your normal ending to keep it in pattern.


The pattern called for you to work the body even in stockinette stitch until it measured a certain length.  I shortened that length (this is where I made one of my vertical adjustments) and only knit it to 14 inches before dividing for the armholes.  I was able to check the length of my sleeves as I went along and didn't have to make any adjustments for those.  When we got to the yoke, I made another vertical adjustment and worked the stockinette stitch one less inch that my size called for before starting the yoke chart.  Since my gauge was fewer stitches per inch vertically, my yoke was longer top to bottom than the sweater in the pattern picture but I was not unhappy with the look.  If I had wanted to shorten it, I could have left off some of the bottom rows of the chart, prior to the first twist in the cabling and perhaps done less ribbing at the top of the yoke.  Either way, it certainly is a beautiful yoke, isn't it?

There seemed to be a lot of confusion on the Errata for Row 25 of the Yoke pattern among the knitters working on the sweater up on Ravelry.  I found this post from the designer to be the most helpful to me:


Row 25 (decrease row): Start the row as established thus far…DecC3F, DecC3B; rep from to last 3 sts, p1, k2.
DecC3F: slip 2 sts to cn hold in front; p1 from LHN; ssk from cn. 
DecC3B: slip 1 st to cn, hold in back; k2tog from LHN; p1 from cn 
However, remember that for me, I started my rows with a k2, p2 and ended them with a p2, k2 so in the helpful post above, I would repeat to the last 4 stitches and then p2, k2.

Oh yes, here's a little tip for the Sleeves:
When you get to the finishing section and join your underarm seams (I used a 3-needle bind off), I think you'll find that you will have two holes (one on each side of the underarm seam).  Everyone in our class ended up with these holes (the sizes of the holes varied).  I left a long tail of yarn when I finished the seaming and basically "darned" the hole shut.  On the other side, where I didn't have any tail of yarn, I grabbed some spare yarn and worked it in, weaving it back and forth among the stitches on both sides of the hole to close it up and then weaved it in a little more to hide the loose ends.

The final order of business was to pick up stitches and knit a button band and a buttonhole band.  The designer mentioned up on Ravelry that her original design did NOT have these bands but the magazine folks added it to the design when they published the pattern.  I found (and again, perhaps this was because of my different vertical gauge) that because they have you placing the actual yarnovers for the buttonholes in the first row of the band and then working seven rows after this, that it put the buttonholes way over to the left of my button band.  I would definitely wait until Row 3 of the Button Band to do the hole placement next time.

For now, I just left it as was and am considering it a "Design Element" otherwise known as a "quirk."


All in all, it was a fun project to do and resulted in a comfy sweater that is perfect for cool Spring evenings and will be one of my "go-to" sweaters for Fall.

Sunday, February 12, 2012

No Chillin' in This Guernsey!


I finished my Guernsey Sweater yesterday and just in time, too, I might add.  The weather has turned hostile here with the wind just howling outside.  If there was ever a time that I needed a sweater that would keep me warm, this was it.

I used a chunky-weight yarn to knit this up and it is quite the heavy sweater, just as I envisioned it.  Today I wore it to church and I can tell you that it stood the test of brutal winds.  Yay!


I was updating my project page for this sweater on Ravelry and found myself curious about Guernsey sweaters in general.  Well, I may be retired now from my library work but I still love a good research project so off I went to do a little digging.


Did you know that Guernsey sweaters were originally knit in the Channel Islands off of Great Britain for fishermen?  They spread in popularity to fishing communities in Yorkshire, Northumberlund, and Scotland.  I suspect these sweaters are a close kin to the Irish Fisherman's Sweater.

Many families had their own unique patterns and these patterns were often passed down from generation to generation. Tradition has it that these patterns were useful in identifying the bodies of fishermen lost at sea when they'd wash ashore.  Their sweaters would be used to identify them.  That kind of boggles my mind but I suspect certain patterns were known to come from certain communities or regions.  So....if a fisherman washed ashore near one town perhaps word would get to his home town and thus, eventually they'd figure out who it was.

The traditional Guernsey sweater is a tightly-knit sweater with a straight neck which has no particular front or back so you can reverse it and wear it either way.  The sleeves are designed in such a way that they allow freedom of motion.  That makes sense when you think about the physical activity that fishermen would be doing out on a boat.  The sides often have welt openings at the bottoms - again to allow maximum range of motion.


The garter stitch separating the patterned part of the sweater was thought to represent the waves of the sea breaking on the rocks or the beach.  The sleeves are often capped by a cabled pattern which is thought to represent sailors' ropes.


Other names for the Guernsey Sweater that you'll sometimes hear are the "Gansey" or the "Jersey."  Also, a traditional Guernsey Sweater would be knit in a blue or indigo color.  If you'd like to read some more about this practical, comfortable sweater, you might want to click on the links below.  All three have short but interesting histories of these lovely sweaters.

"A Knitted History - the Understated and Practical Traditional Guernsey Jumper"
"The History of the Guernsey Jumper"
"A Short History of the Hand-knitted Gansey"


Tuesday, January 17, 2012

It's Curtains for Eventide


Must be this cold weather OR the fact that I've been recovering from a bronchial thing, but I've been getting a lot of my knitting projects completed lately.  This project is the Eventide Scarf designed by Laura Nelkin.  It is a gorgeous scarf but boy, was it a bugger to knit.


Now, in all fairness, I haven't done a LOT of beadwork in my knitting but I'm not a stranger to it.  I don't know if it was the placing of the beads, the unusual stitches, or the fact that I knit Continental-style which caused the problems but I sure don't plan to knit another one any time soon.  Actually, it could have been a combination of all three factors.


The biggest problem I had with it was the fact that I couldn't get into any set rhythm while I knit because I was always having to stop and change hands and then maneuver the beads into place and then wrestle them back where they were supposed to be after I completed the stitch and then get my hands and yarn back into position for my normal style of knitting.  The ladies in my group who were NOT continental knitting seemed to be having an easier time of it in that regard.


Once I finally got past the rows with the beads, things went a little quicker.  My main complaint then was the fact that I couldn't let my concentration lapse for a minute when I was working on this.  It was a fussy pattern.  I couldn't do my usual "watch TV and knit" routine.  Plus I've always enjoyed the fact that, if I make a mistake, I can usually work my way backwards to the place where I needed to correct things and then fix the problem and continue on OR I could drop a stitch at the point where a mistake might be rows below, dropping that stitch all the way down to the offensive stitch and then rework it back up to my current row.  Well, forget doing any of that with this pattern.  My goodness, it was a real bear trying to correct anything.  It was just very hard to read and to "tink" or "frog" (for you knitters) if you, God forbid, had to go back.


The end result was a lovely scarf, however, and that gives me a certain sense of satisfaction.  Believe me, there were MANY points when I was ready to just throw the darn thing in a corner and give up on it in frustration.  I'm glad that I stuck with it.  It's "curtains" for this particular pattern in my house, though.  "Eventide" has been banished to the perpetual night within my folder of "completed projects."

Saturday, January 14, 2012

Give a Hoot


I recently finished two owl hats for my grandchildren's visit to Pennsylvania from the much warmer state of Texas.  The pattern is a Spud and Chloe pattern called Hoot Hat and designed by Susan B. Anderson.  If you are a member of the website Ravelry,  you can view the particulars here.

The pattern itself was very easy and worked up quickly.  The only fussy part was doing the face features and even those weren't all that hard to do, especially if you can crochet.  The designer calls for knit eyes and beak but I found that crocheting some circles and a triangle were much faster and easier to do and then I just had to sew them on to the hats.  I used black felt for the irises of the eyes.

And how did the kiddos like the hats?  Well, I 'll let these pictures show you.


  "Hey, little Luke....isn't it fun wearing Nana's Owl Hat that she made for you?"


"I think I look pretty nifty in this hat.  Just don't expect me to fly around yet because first I have to learn to crawl."


"Aaargh, Mommy, what are you doing?  I don't want to pose with my sister.  She might drop me or even worse, push me out of the nest."


"The girl is nuts, I tell you....nuts.  I've got my eyes on you, Sis.....all four of them."

Monday, October 31, 2011

We Made the Weather Channel


Yes, our little corner of Pennsylvania made the national news this weekend when a freak snowstorm hit us on Saturday.  Jim Cantore, from the Weather Channel, actually came to town and was broadcasting live from our area as the snow came down.  Now remember....this was October 29, not the end of November or early December.


It was a really wet, heavy snow too, which made it particularly devastating to tree branches, fences (like our neighbor's fence seen in the distance from our backyard), and power lines).  The towns just south of us got about 10 inches of snow Saturday.  We got about 5-6 inches of snow before things tapered off and I suspect it was actually more but the weight of the snow just compacted everything down.


I kept expecting us to lose power.  The lights were flickering all day and several times they went off but came right back on.  I was working away on my computer most of the day and even when the power went off, it came back so quickly that my computer just came back up without rebooting.


We were the lucky ones.  When all was said and done, over 250,000 people in our area were without power.  Ugh!  Even our church was without power until Sunday afternoon.  Our church staff decided to cancel most of the activities and one of the services but they went ahead and had one service without power or heat and over 170 people showed up.  The heat generated was from warm hearts and good fellowship.

I got a lot of knitting done Saturday and Sunday.  It was the perfect time to snuggle under a blanket in the recliner, find some episodes of a British comedy to watch (I'm currently working my way through past seasons of the British show "The IT Crowd," and to work on winter knitting.


I finished this cowl.  The pattern is the "Nougat Cowl."  I love the colors of the yarn, don't you?  It reminds me of the changing leaves of trees in autumn (not that you'd know it, looking at the trees in my yard after our winter storm).  This wasn't a Christmas gift.  I took a quick break to knit this up for myself.  When I saw one like it at my local yarn shop and found out they had some of the same yarn available, I just had to snap up a skein and whip one up, too.  Now that it is finished, I'm working on a Boo Boo Bunny for little Luke.  His sister, Mika, reminded me that Luke didn't have a bunny of his own.  She was holding HER bunny at the time, which I had made for her when she was a newborn.  That was all the incentive I needed to get busy on some knitting for baby.

Stay warm!  Winter is obviously just around the corner.

Friday, June 17, 2011

Another One Off My List

Notre Dame de Grace Sweater
Ah, it is SUCH a feeling of accomplishment when I finish another knitting project.  This one is my "Purple People" sweater.  It is knit with Cascade 220 Heather yarn from the Notre Dame de Grace pattern designed by Veronik Avery. 

Hmm, what's with these stitches?
The pattern is very easy to follow overall but I did run into a bit of a snag when I was working on the shawl collar.  I had followed the instructions and picked up some live stitches (a side at a time) to knit the two sides of the collar, which I then seamed together in the middle with a 3-needle bind-off.  But that left me with a group of stitches that were still live in the middle of the back.  Hmm, there didn't seem to be any mention of what to do with these.  The next instructions said to sew the collar to the body of the sweater.

Ravelry members always come through!
I had pretty much decided that I'd just bind off the stitches and then continue on with the directions but I thought I'd do a little more sleuthing.  I went up on Ravelry , which is just the best resource for knitters that I know of, and did a search on the pattern.  Ravelry has a great feature where you can search for a particular pattern and then, once you find it, you can click on that pattern and be taken to the description page where there are tabs that you can click on that show you all the projects knit from that pattern (along with the knitters' comments), blog posts about the pattern, and forum posts about it.  Sure enough, I wasn't the only one confused by the lack of instructions for those live stitches.  Others had wrestled with the same thing and come up with the answers.  Yes, the designer had meant for us to bind them off.  Yay!  Question answered.

A-binding we will go!
Once I had my marching orders, I made short work of binding off those stitches and then it was on to the next step.

Collar waiting to be attached
It was a simple matter to sew the collar to the top of the back sweater piece.  I already had my shoulder seams attached.  Once this was done, then I just had to tack the one placket behind the front flap and pick out a button.  There is no actual buttonhole.  You just sew the button through both layers of the front flaps.  There is still plenty of stretch to get your head through the opening.

Collar Close-up

Here is a closeup of the finished and attached collar before I sewed the button on.  I actually had a nice dark purple (but, of course) ceramic handmade button that worked perfectly for this sweater.


Here's the finished sweater.  It fits like a dream, too.  With the double seed stitch, it is nice and stretchy, which I love.  I HATE clingy sweaters.  I also love the ribbing across the shoulders, which gives it a visually-appealing contrast to all the seed stitch in the garment.  It has long sleeves, too, which is wonderful since I still can't see much sense in 3/4-length sleeves in a sweater.

A purple sweater for a purple person
And here it is......with perfect timing, too because I just got my new glasses which are purple.  I'm calling it my "Purple People" sweater, in an oblique homage to a comment I heard recently when someone referred to some folks as "purple people."  I never did find out what she meant but the feeling I got was that "purple people" are .....well, let's just say that they march to a different drumbeat.  That's fine by me.  I like purple, I wear it, and I'll gladly be counted a "purple person."    And with that, I'll just say that this is one sweater pattern that I shall definitely be using again.  Thanks, Ms. Avery and thanks, Ravelry for coming through for me yet again.